
COSTUME AND MAKEUP
Introduction
As part of the process of producing our trailer, we had to obtain research based on different character outfits which we collected from analysing different character outfits from different real media text. Due to the fact that our sub-genre is a merge between Psychological and Gore (otherwise known as Splatter) most of the media texts we used posed as reference to those sub-genres. For the character make up and outfits we had to do thorough planning and experimenting in order to attain the best possible outcomes, so that we could create a sense of realism through the appearance of our characters.
|
|
Profiling of the team |
|
Oulayma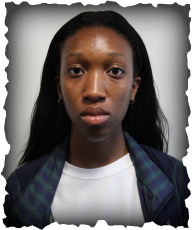
Role: Costume & Make Up
|
Haja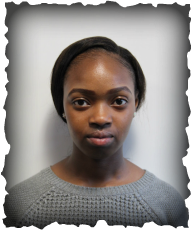
Role: Shooting Script & Location Recce
|
Alpha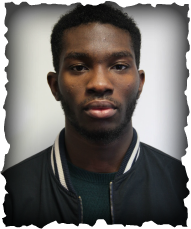
Role: Camera Work
|
Simon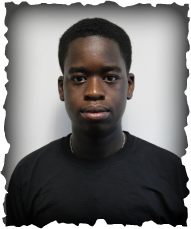
Role: Sound Design
|
|
|
Character Cast |
|
Lucy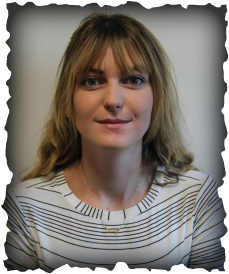
Name: Alysia Cahill (Final Girl/Protagonist)
Played by: Lucy Renshaw Age: 18 Role: Alysia Cahill is your typical everyday teenager and much like other teenagers she always wants to look good. This is shown through her trendy way of dressing (Skater skirts, trainers etc...) She's a very open person and is friends with Jennaly who she convinces to accompany her to Ed's Beauty. Little did she know what she got herself into. |

|

|
Maada
Name: Ed Morte (Antagonist)
Played by: Maada Sesay Age: 19 Role: He is the antagonist who tortures his victims, believing that by doing so he is doing them a favour and fulfilling his mission. He starts off as being a very social individual, known and loved by many because of his aesthetics. As his obsession continues to grow, it becomes evident that Ed Morte is a very vanity obsessed individual who will do anything in his power to make himself more beautiful – no matter how drastic. Perfection is all he strives for. |
Huldah
Name: Jennaly Hill
Played by: Huldah Boakyewaa Age: 18 Role: Jennaly is a very quiet and reserved character, just so happens to be that she's Alysia's friend who decides to follow her and becomes entangled in Ed's morbid fantasies. |

|
Genesis
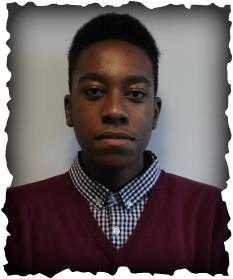
Name: Ed Morte (Back Up)
Played by: Genesis Adeleye
Age: 19
Role: He is the antagonist who tortures his victims, believing that by doing so he is doing them a favour and fulfilling his mission.
He starts off as being a very social individual, known and loved by many because of his aesthetics. As his obsession continues to grow, it becomes evident that Ed Morte is a very vanity obsessed individual who will do anything in his power to make himself more beautiful – no matter how drastic. Perfection is all he strives for.
*His outfit would be the same as Maada's as Genesis is a backup character*
|
|
Real Media Texts |
|
Texas Chainsaw Massacre |
Hostel |

|

|
|

|
|
In this trailer the antagonist Leatherface always has a recurring prop that he uses for a major part of the trailer, the chainsaw. In our trailer we had also picked up on this feature and decided to let our antagonist have a tool/s that he uses, to not only modify himself but also to torture his victims.
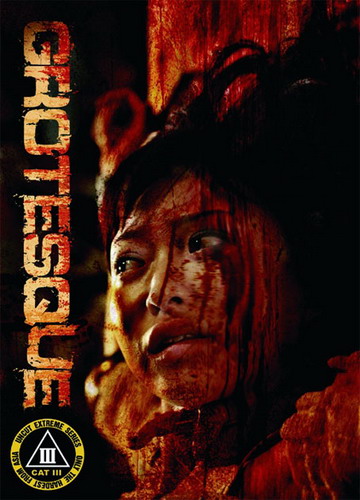
Grotesque |
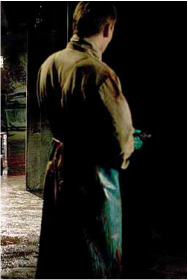
In the Hostel trailer I was particularly fond of how the antagonist seemed to all be wearing a uniform of some sort enabling the whole idea of torturing to come across as routine. This is an idea we want to adopt and apply to our antagonist.
Friday The 13th |
|

|
|
|
|
In this trailer we payed attention to how the antagonists wore uniform much like our antagonist, Ed Morte. We also diverted our attention to the protagonists (in this case the victims) and how they chose props such as ropes to create more believable situations and also the mild makeup that gave them a beat up look.
|
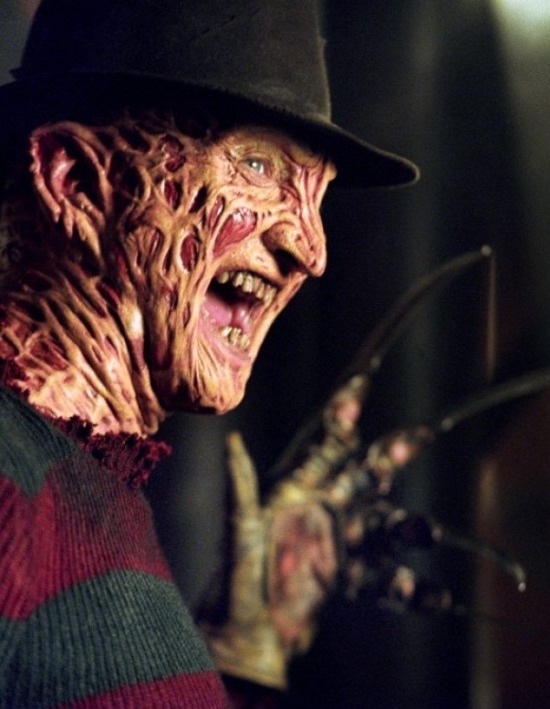
Friday 13th has the antagonist Freddy Krueger who helped to inspire our antagonist's aesthetics. Freddy inspired our antagonist due to the makeup used on his face where it has morphed the way his natural features would and should look.
|
|
|
Making Of T-shirts |
|
Below are the t-shirts I created using a mixture of different mediums. It was pretty easy to make the shirts as I already had an idea of how I wanted them to look before having actually attempted to put the 'blood' on the t-shirts. Due to the fact that the blood was supposed to look random I did not use any reference images as it would have come out looking too planned for this reason I aimed to produce the two of the shirts in one attempt for each piece.
To make both shirts I used a my hands, a brush and a sponge which were dipped in red face paint
To make both shirts I used a my hands, a brush and a sponge which were dipped in red face paint
ED MORTE'S T-SHIRT


JENNALY HILL'S T-SHIRT


|
|
Injury Inspiration |
|

|

|

|

|

|

|
All of the images above show fx make up of impact injuries such as bruising. In our trailer we aim to put scarring, wounds, bruises etc on our characters during the course of the disequilibrium. This should add to their looks by making them look as though they have been held in captivity and tortured for an elongated period of time.
|
|
Tutorials |
|
|
|
|
|
|
|
|
In this video there is the use of the Skin Illustrator Alcohol Palette which creates realistic looking bruising which will be used on our protagonist to create a beat up look.
|
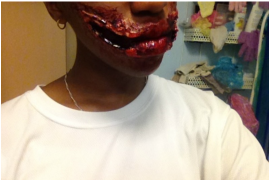
In this video she uses special fx make up to produce the Chelsea smile, which happens to be the desired look for our antagonist Ed Morte. We chose to use this make up as it looks like an act of self-harm that an individual would actually be capable of inflicting on themselves.
|
Here, she used a mixture of materials to achieve the gauged out eye look. This will once again be another form or self harm that our antagonist inflicts on himself. This shows body modification as he wants to achieve perfection and his idea of perfection happens to be distorted.
|
Once again much like the bruised make up we chose to use this tutorial to make our protagonists look as though they have been going through long term torture.
|
I chose this make up look for our character Jennaly which is our protagonists' friend. In order to communicate the idea of torture we decided to add the cut finger look to her overall look to give more effect to her overall character.
|
|
|
Equipment |
|


|
|
My Attempts/ Experiments |
|
In order to create the graphics content in our trailer, we had to practice creating the make up looks on either a model or on ourselves.
|
|
Outcomes |
|
CUT OFF FINGER LOOK
SCULPTING
Below are my attempts of the cut of finger tip special effects make up. I used a variety of mediums to attain this look and they are: Nose and Scar Wax, Skin Illustrator Fx Palette, Liquid Latex, Stage Blood and Scab Blood. The scar wax was used to hide away the tip of my finger, from there I began to sculpt the wax in the way I wanted it to look, creating a groove at the very to to give it the look of my bone sticking out. Latex was then added to 'lock' the wax and made the surface of the wax easier to work with.
COLOR
I then went on to adding realistic colors and tones to create a sense of realism by mimicking the color of my other fingers using the alcohol activated Illustrator palette. I then took red tones to make the finger look irritated and sore, after having done that I colored the groove at the top of the finger where the bone is supposed to be exposed with a light red, dark red and black to give the cut area more shading. Once all of that was done I applied the scab blood and stage blood onto the finger to make it look like a fresh cut.


BRUISED LOOK
BRUISING & COLOR
In the pictures below are my attempts at producing bruise wounds. I created them using the alcohol based Skin Illustrator Palette, Stipple Sponge, Cosmetic Sponges and Q-tips. I simply started off by creating little sink wholes in one of the cosmetic sponges by pinching off little bits of the sponge, which created grooves in the material. From there I went straight to using the alcohol colors taking the color and adding more alcohol when I wanted the colors to appear more dilute and less alcohol when I wanted the color to be darker. In a dabbing motion I started applying it to the skin using both the cosmetic sponge and stipple sponge to add the colors (also used my fingers to fade the colors in certain areas). Once all the colors I wanted were added I used the Q-tips with a dilute red color to create the look of skin irritation/soreness of the skin. The scar in the middle of the bruise was made using rigid collodion with some scab blood placed in the middle to give the effect of an aged scar.
In the pictures below are my attempts at producing bruise wounds. I created them using the alcohol based Skin Illustrator Palette, Stipple Sponge, Cosmetic Sponges and Q-tips. I simply started off by creating little sink wholes in one of the cosmetic sponges by pinching off little bits of the sponge, which created grooves in the material. From there I went straight to using the alcohol colors taking the color and adding more alcohol when I wanted the colors to appear more dilute and less alcohol when I wanted the color to be darker. In a dabbing motion I started applying it to the skin using both the cosmetic sponge and stipple sponge to add the colors (also used my fingers to fade the colors in certain areas). Once all the colors I wanted were added I used the Q-tips with a dilute red color to create the look of skin irritation/soreness of the skin. The scar in the middle of the bruise was made using rigid collodion with some scab blood placed in the middle to give the effect of an aged scar.

|
CHELSEA SMILE
Here is the Chelsea smile that our antagonist Ed Morte is going to have. It was made using a mixture of materials which included sculpting wax, liquid latex, skin illustrator palette and scab blood. It took a fairly long amount of to make as we had to wait extended periods of time for the latex to dry in order for the tissue layers and cotton wool to dry. The coloring of the scar was the most easy part as all we had to add was the red tones, some black to give the scar dimension and the blood.
|

|
OTHER POSSIBLE SCARS
Below are some other scar ideas that our characters can have to give them more gory and gruesome looks.

|

|
|
|
Evaluation |
|

|

|

|
When making the special effects make up I encountered some problems such as the use of Nose and Scar wax to create the lacerations in the face and smile. The Nose and Scar wax were difficult to work with as the wax began to melt due to body heat when holding it and/or trying to mould it into other shapes and size. I overcame the problem by using another type of wax called Extra Flesh (Mehron), this was much easier to work with as it did not react to body heat as quickly as the first wax I used. Additionally I found out that using make-up remover or Vaseline on both the types of wax reduced the chance of the wax sticking to my fingers as I worked with it.
